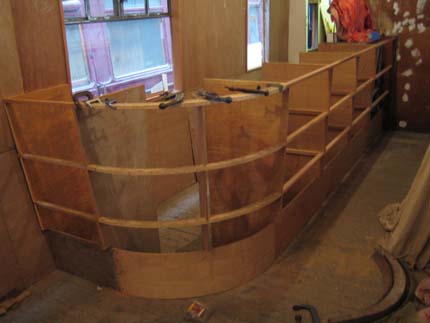
During April 2006 work started on the building of the most important part of the coach interior - the bar! It was decided to construct the bar in such a way that it could be easily moved away from the side of the coach to facilitate the fitting of the interior wall covering and subsequent permanent placement of the interior plywood lining. Thus the framing was constructed with minimal fixing to the coach side, bulkhead and floor. The most difficult part of the framing was the curved section in the foreground which was made from a series on non-concentric quarter circles cut from 18mm plywood which were fixed to the other horizontal f rame members using glued lap joints. Panelling of the bar was started at floor level. The straight part was easy, but to get round the curve at the end it was necessary to saw half-way through the thickness of the plywood many times in vertical parallel lines (on the back side) to allow the panel to bend round the tight curve. Chris (a new recruit, hurrah!) cut and fitted numerous shelf supports to the vertical bulkheads of the framing.


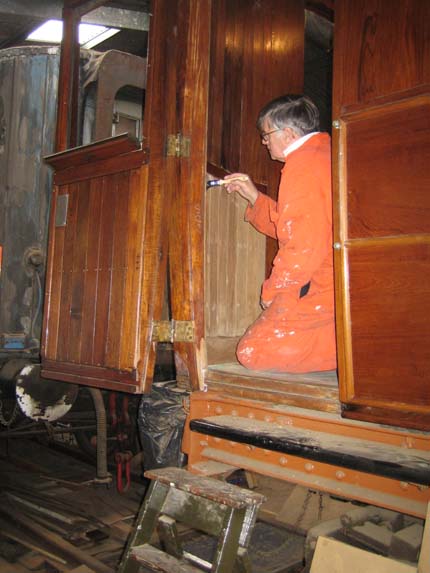
Jim, Bob and George have strived manfully with the tongue and groove panelling at the east end of the coach. The panelling has now been cut to length, packed out to achieve a reasonably smooth outer profile, drilled and pinned into place, filled, sanded and gold sized. George is seen here applying gold size to the panelling. A repair to the main gangway arch timber was made by Don - a damaged piece of wood removed and chiselled into a rectangular groove, then a piece of matching teak shaped and glued into the slot. After sanding down flush and sizing it is "hard to see the join". Having completed their labours in the east vestibule, Jim and Bob moved on to finishing off the main kitchen / saloon bulkhead the thickness of which needed doubled to house the sliding door accessing behind the bar.
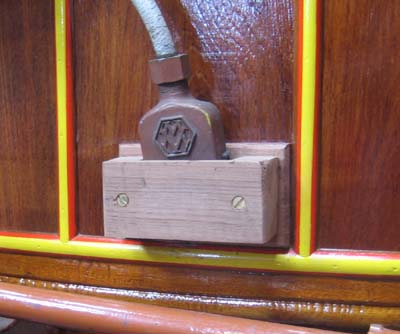
After completing the wiring of the RCH connectors, Robin made four new holders for the plugs which are mounted on the
end of the coach. The backing plate had to be scooped out so that its profile would match that of the curved vertical end panels.
This was sealed with flexible mastic round the edges and a spot of polyurethane glue was applied to the centre of the plate before
it was permanently screwed into position.
The picture shows the body of the holder attached, but not yet finished. The
corners still need routered to the correct profile and of course sizing and varnishing are still required.


Three of the exterior doors fitted just fine, but one, at the north-east corner seemed a bit shy on width although the
profile was fine. Anecdotal evidence from some Society members have hinted that this was always the case and may be the result
of "interchanging" of doors between coaches in the dim and distant past. The door was made slightly wider by adding
a packing strip on the hinge side of the door - this was about 3mm thick at the top of the door and 6mm thick at the bottom.
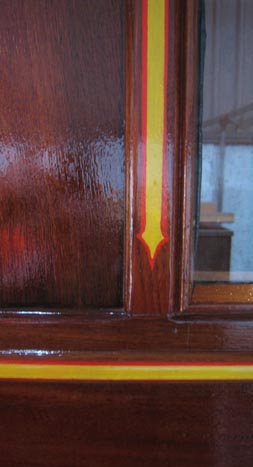
The lining out continued through the summer of 2006, Jim and Dave manfully tackling the 600-odd feet the job required.
As well as the two-colour lining out of the horizontal side mouldings and the vertical end mouldings, the upper part of the
coach sides also have to be decorated with an arrowheaded motif top and bottom as shown in the illustration on the left.
This is a very time-consuming task!