
Before we could start the restoration proper, we had to determine the current state
of the bodywork and chassis. The body was to be lifted clear of the chassis so that the latter could be
repaired and prepared as necessary. One of the initial observations was that the body was not properly
bolted down onto the chassis! So lifting the body became an absolute necessity.
However, before lifting, the body integrity had to be established. Was the framing good enough? Were
the knee irons (which keep the horizontal and vertical parts of the frame at right angles to each other)
in good shape? To find out, the lower half of the body was stripped of panels to expose said framing and
knee irons. The panels were removed as carefully as possible to prevent further splitting. Some of the
panels were made from (rotten) plywood and were therefore discarded, but teak panels were preserved
wherever possible for re-use.
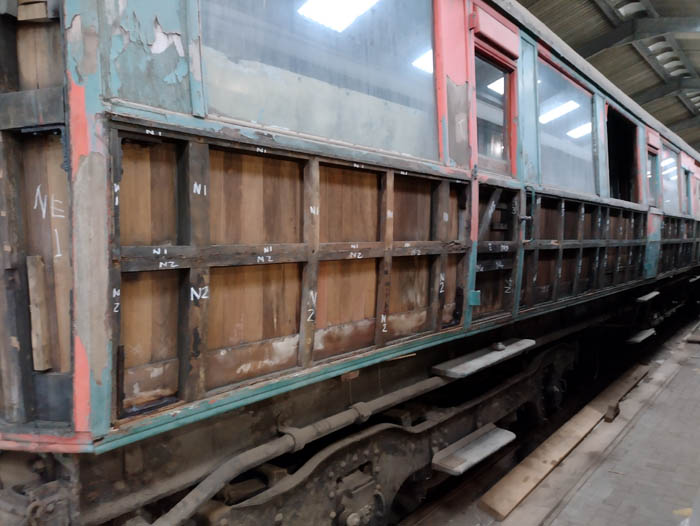
The exposed framing and knee irons were carefully inspected. These were in rather better condition than one would normally expect for a vehicle of this age. The usual sight is one of rusted bolts swelling up inside the timber and splitting the framing, but there was almost no evidence of this at all. A few knee iron securing bolts had rusted beyond useful life, but most were still good and strong as were nearly all of the irons - some even looked almost new! After removing the surface rust these were painted with a rust preventative and sealant.
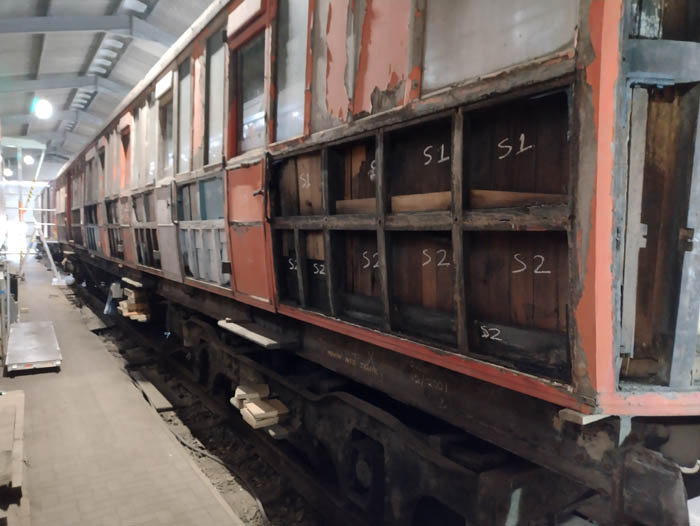
Damaged teak panels were repaired where appropriate. The splits usually started at one
end or the other because steel pins had been used near the ends to secure the panels in BR days, perhaps after
some repair work. Steel pins rust and swell, thus splitting the teak panels. The LNER used brass pins and
glue blocks to secure the panels. Definitely no steel pins or any sort of pins near the ends of the panels.
The splits were repaired by glueing them, then strengthening on the inside using a covering patch (or fishplate)
across the glued repair. As long as this patch was kept clear of the framing, all would be well. All the old steel
and brass pins were removed then the holes filled with "JWR filler". John W Russell made up this filler
using teak sawdust (from the sanding of the panels) and liquid PVA glue. A remarkably good match resulted.
The inside surface of the panels was painted in primer/sealant so that fire retardant paint would adhere
properly to the panels when the time came to re-fit them.
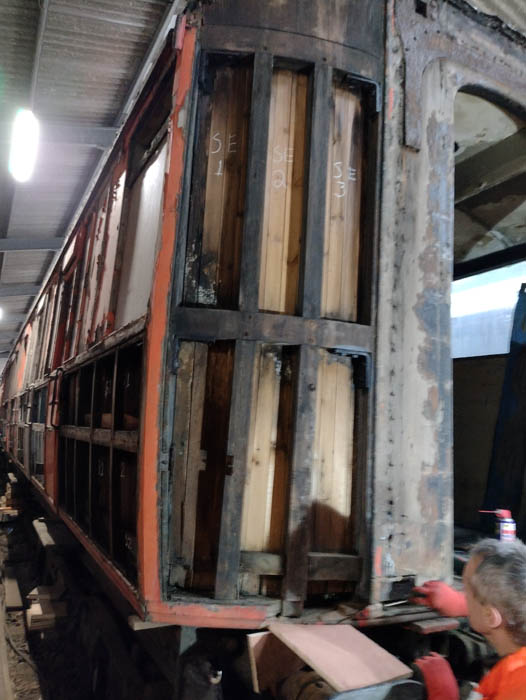
The vertical end panels were also removed. At the east end, BR had put in a window as a facility when in departmental use. Part of the end framing had to be removed to fit this window and it was thought wise to replace the framing (for strength) before attempting any lifting. It was interesting to note that the framing structure of the ends was different from both the TK 1002 and the buffet 644 in that there was only one horizontal rail half way up the wall on the BTK rather than 3 (at the quarters) on the other 2 vehicles.
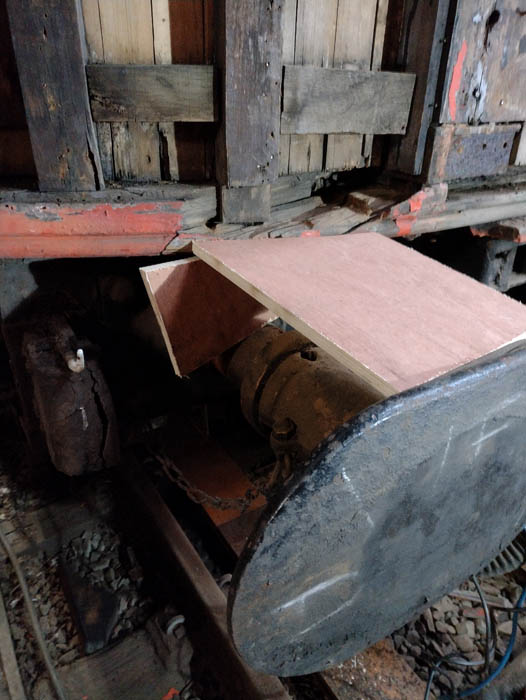
Part of the wood base forming the floor at the SE corner was rather badly damaged. No obvious reason for this,
perhaps a rusty swollen vertical bolt invisible from the outside,
but again, it was thought prudent to repair this split before attempting a lift of the body.
It turned out to be a vertical rusty swollen bolt which had caused the trauma. This was removed. The pieces
of plywood in the photo were used to force the teak back into roughly the shape it was before splitting.
Copious amounts of glue were pourred into the inner split before the plywood wedge was used again to force
the split to close. A patching piece was then made to fill in the gaps left by the removed damaged teak.
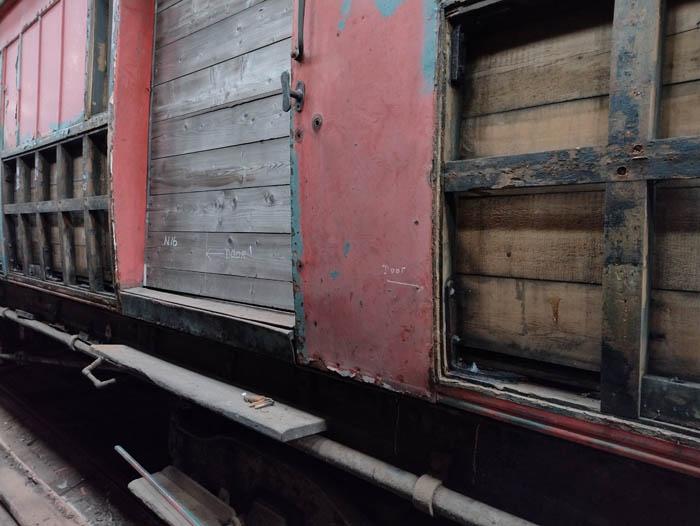
When referring to the LNER drawings of the brake, the position of the second (western) set of cargo doors was apparently misplaced. BR had removed these and replaced them with a sliding door on the south side and a boarded up aperture on the north side. The photo shows the north side and especially the curved knee iron beside where the legend "Door" has been chalked. The iron shows that the side of the (double) door should have been where "Door" has been chalked. In due course the boarding will be removed and the door aperture re-made in the correct position.